New Video: Hold’Em Hands

The routine “Hold’Em Hands” is a simple poker hand demonstration that utilises the Texas Hold’Em community cards. A small packet of face down hole cards is spread through one at a time. Each time there are different hole cards face up that (when combined with the community cards) display every possible poker hand in the game.

This video was shot in one take with no edits used as part of the effect. It was a secondary project while I was filming the demo for a new card effect. It is a simple routine that is not designed to be flashy.

It has evolved from 3 core ideas:

  1. I wanted to create a Poker Hand Demonstration using the Texas Hold’Em Community Cards
  2. I wanted to incorporate a “Twisting the Aces” style presentation where different cards (the required cards) would appear face up in the deck.
  3. The final reveal of the Royal Flush with the community cards.

The challenges came from deciding on a set of community cards that could support every single poker hand with the addition of having only a small packet of hole cards to cycle through for the routine.

I like that this routine can be enjoyed on a few levels. Lay people can either watch or interact by guessing the next hands to appear. Magicians and Gamblers working (or anyone who watches to work out the method) will no doubt spot a few popular sleights, but will also hopefully be surprised by a few aspects of the handling.

I will release a free video tutorial soon demonstrating the method behind this routine and some others I have recently created.

Sleights, Camera, Reaction

As things get busier out IRL, things do get quieter here on my website. This is not reflective of my card work and magic practice. My days have been filled with learning new tricks, new sleights and, most importantly, working on some great new ideas.

NEW MATERIAL

Over the the last few weeks, I have created and updated multiple new routines to add to my live set and to potentially sell. Whenever I get a wave of creative inspiration like this, I know not to waste it.

I have created so much in the last few months, it has been hard to find the time to note it all down. Some of my new tricks include a fun new torn card reveal, an ACAAN effect and an impossible card penetration illusion called “Beeline” that (even though I know how it works) still sometimes fools me!

I am cautious not to go into too much detail before releasing my creations so I can protect and properly copyright the ideas. For now, the goal is simply to test and fine tune everything as much as possible.

REFINING, REHEARSING, RECORDING

The time has come to produce demos and instructional videos for the stronger of my multiple new tricks.

This is always great fun, but very time consuming. I have tested my new 4k equipment regularly filming songs with my band Walker St and I now have a powerful new laptop capable of editing the UHD footage to professional standards.

My new illusion trick “Beeline” will be produced and released first as it is a routine that requires very little spectator interaction to demonstrate. The other routines are much more interactive so I will need to wrangle friends and family to be involved to film them effectively.

SO HERE’S THE PLAN

The time has come for me to structure a solid 30-45 minute routine that I can perform regularly and reliably to build up the match practice I need to move forward in this craft.

In the coming months, I plan to visit as many people as I can (as many as will have me!) to practice my brand new (and first ever!) live card magic / gambling demonstration show. I look forward to finally demonstrating what I have been working on and hearing everyone’s feedback.

During the performances I will take the opportunity to video some demos of my original work and catch people’s reactions. The videos will have much more effect when filmed in front of spectators and will better demonstrate the routines to those who may wish to purchase and perform the tricks themselves.

So … who’s in?

HERE’S ONE I PREPARED EARLIER

Meanwhile, as you wait for my new videos you can check out all of my previous video releases on Penguin Magic.


The Original Rubber Band Through Card

Cut, Copy, Paste

On July 25 this year I had the honour of seeing one of my magic ideas (Rubber Band Through Card) published on one of the world’s largest magic retail websites. This would have been a fantastic moment for me had I been the one to release it.

Obviously curious, I purchased the familiar looking, but differently named, trick only to find it frighteningly similar to something I released three years prior in 2015. It mirrored my trick in:

  • Method
  • Handling
  • Teaching, and
  • Promotion

The video was subtitled, but the translation used many of the same words and phrases in its advertising, and even followed very similar steps in teaching the method.


RBTC Rubber Band Through Card
My original effect “RBTC” Rubber Band Through Card – Released Jan 2015 on Theory 11 and Pengiuin Magic

The Effect

It is easy to think that I was directly copied, but as a songwriter I am very aware of how one person’s creative process can overlap another’s. My concern was not that my effect was stolen, it is that, no matter how independently conceived, it is just too similar.

For an almost identical trick to be released on a web marketing juggernaut like this, runs a huge risk of overshadowing my work in all series of online forums and markets. Essentially, my original trick could become known as the “other” version or referred to as “just like” this more robustly advertised clone.


The Approach

I reached out to the magic company in private. I asked for them to discuss the issue with me so that we could clarify if the trick was indeed too similar.

After a few requests I managed to get in touch with one of there core members who was kind enough to review my work and compare the similarities.

Side note: When they asked for a copy of my method for RBTC, I very nearly replied saying “You have a copy! You’re selling a copy of it!” but I took the high road and sent them a copy of the video.

According to them, the 3 levels that classify an effect’s originality are:

  • Method
  • Presentation
  • Plot

When comparing our two versions of the same trick, it was deemed that the tricks “have the same foundations” but a different plot and alternate handling.

I accepted that mathematically it could be proven that the two tricks were different enough to both be sold separately. Unfortunately there is just no way to accurately measure the “feel” of the effect which I believe to be almost identical.


The Review

In all honesty the hole actually adds something more …  as you’re proving the magic by having it stop in a hole halfway.”

The email from the core member of this magic company continued saying:

Some could consider yours superior as it has the hole plot/handling to it.

Regardless of the circumstances, it was great to have my work reviewed by a company that I have been a member of for many years, and hold a great deal of respect for.


RBTC (Rubber Band Through Card)

The original and the best!


The Conclusion

I will let you be the judge as to which effect is more deserving of your US$4. I have learned a little more about the industry through this experience and I want to make it clear that I don’t hold any grudges.

However, I will be very hesitant to release material publicly that I am unable to clearly claim later as my own creation. There is simply too great a risk these days of even a demonstration being reverse engineered.

I look forward to sharing some of my new material with you all very soon!

EUFM: Biscuits (Cookies)

Everyday Uses For Magic

Sleight of hand is something that requires a lot of time and practice working on moves that are only really ever used in performance. On this blog I plan to do a series called “EUFM” (Everyday Uses for Magic) that will put those hard earned skills to use in day-to-day settings.

The dexterity and shade awareness achieved while working on magic tricks can not only be practiced everywhere, but can be used to get a slight edge in many other non-magical circumstances.

No Biscuit Tricks

Here in Australia, biscuits are what others might call “cookies”. Regardless of there name, its important to note that I am not referring to their use in magic tricks. Although if I were …

This article is aimed at highlighting where knowledge of magic and sleight of hand can give you a huge advantage at home, in the office, or any other biscuit sharing situation.


The “Fair Share” palm

The idea behind this sleight is to clearly present to family members or coworkers (or anyone else you might be sharing a plate of communal biscuits with) that you are only taking a single biscuit in assurance that everyone gets their fair share. This is demonstrated in picture 1.

As you can see in picture 2, using your awareness of palming and angles, you can quite easily hold out 2 or 3 more unfair biscuits to enjoy later. I recommend ditching the extra load into a pocket or biscuit sized topit of some kind  to lower your chances of flashing what you’re holding out and being outed as a greedy cheat.


The Bad Bikky Force

A common tool used in tricks is called “Magicians Choice”. This is also known as “equivoque”. This specially crafted method of social engineering can also be used to ensure you get the best of 2 available choices. For this example we will use the following 2 biscuits.

Let’s assume you are really in the mood for a cream filled double layer biscuit (pictured left) and have to get someone else to “choose” the other, non-creamy, single layer biscuit (pictured right). You simply ask them the following question:

“I want to eat one of these biscuits, which would you prefer?”.

Outcome 1: They respond “The creamy one”:
In this instance, you immediately pick up the creamy one, clarifying that the creamy one is the one they preferred you to eat.

Outcome 2: They respond “The non-creamy one”:
In this instance, you immediately pick up the creamy one, clarifying that they just said they preferred to eat the non-creamy biscuit.

The quicker you take a bite of your preferred biscuit, the less chance your loaded question will be challenged.


The One-Handed Multi-Hold

With all the props and flourishes used in tricks these days, magicians tend to get quite strong and flexible hands. This versatility and dexterity has previously only been used to shift card packets or sleeve coins. Using these same skills on your coffee break brings a whole new angle to the simple acts of lifting and holding.

One simple example is pictured below:

With one hand I am able to hold my biscuit (the creamy one I conned someone out of earlier), my coffee cup and a handy saucer to catch drips and crumbs. I invite all those practicing sleight of hand to hold items in non-standard ways like this – being careful of hot liquids or sharp edges.

This way of holding my cuppa and bikkie may seem a little over the top to some, but with my other hand now free, I am able to lift more delicious items. Theoretically, at any given time, I could have my coffee, saucer and current biscuit in my right hand, while palming multiple future biscuits (or other communal foods of choice) in my left.


In conclusion

The goal with this experiment is to utilise sleight of hand in common, non-magical and non-harmful ways. To make use of the unused skills earned by magicians and card sharps. Being creative with every part of your day can only help make you a stronger performer!

If only there were some real magic around that could make the extra weight gained from eating all the additional biscuits disappear!


Magic Card Surface for Under $20

My DIY Ideas

A habit I have when entering any creative area is “how would I do it?” Often before learning the method to a trick, I try to achieve the outcome by composing my own method.

The results of my experiments will be categorised on this website under “Creations“. The ideas will range from moves, tricks, decks and accessories.

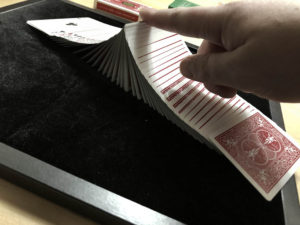
Magic / Card Surfaces

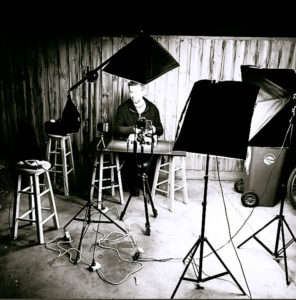
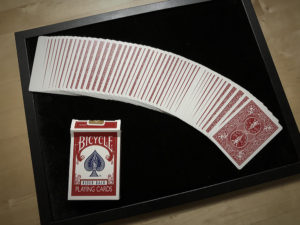
I practice cards every day in all environments. It’s easy to have a deck in your pocket and practice your standing or in-the-hands sleights whenever there is a quiet moment.

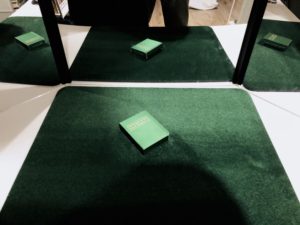
A lot of the moves I work on are based at the card table. This requires a felt mat to enable access underneath cards and packets when lifting them. Neoprene & Rubber roll up mats are most common and are available at many magic stores. These are great for your desk or table but I enjoy practising in other locations – like while travelling or even on the couch.

I experimented with stable table devices, portable fold-out card tables, stools and chairs – all of them were fine but very inconvenient to both store and set up. I eventually spent some money and bought some card surfaces from Dan & Dave’s website. These were both expensive to purchase and expensive to ship but, as with all of Dan & Dave’s products, the quality is outstanding. I now own the Aluminium Close Up Pad (perfect for travelling) and a Green Magic Surface.

Create Your Own Surface

I have since created a way for those entering into card or magic work to create a surface that will suit their needs and their budget, until they can buy the real deal.

It may even eliminate the need for a more expensive option!


You will need the following 5 items:

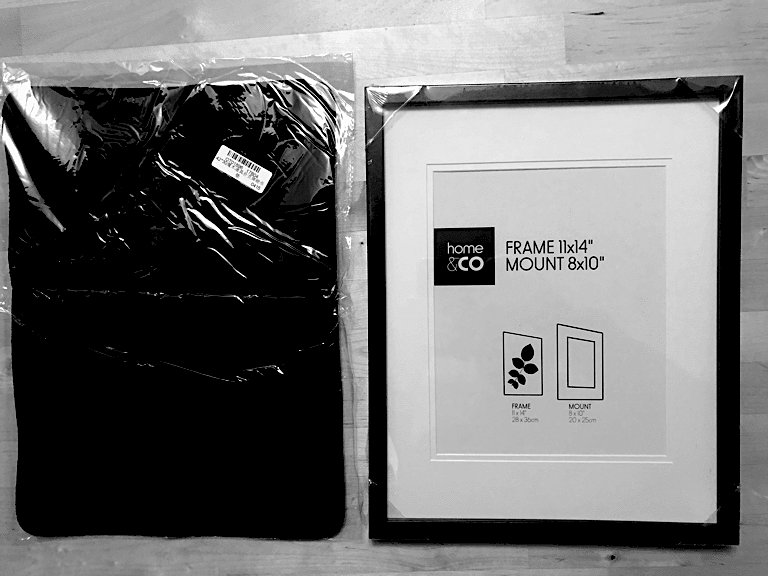
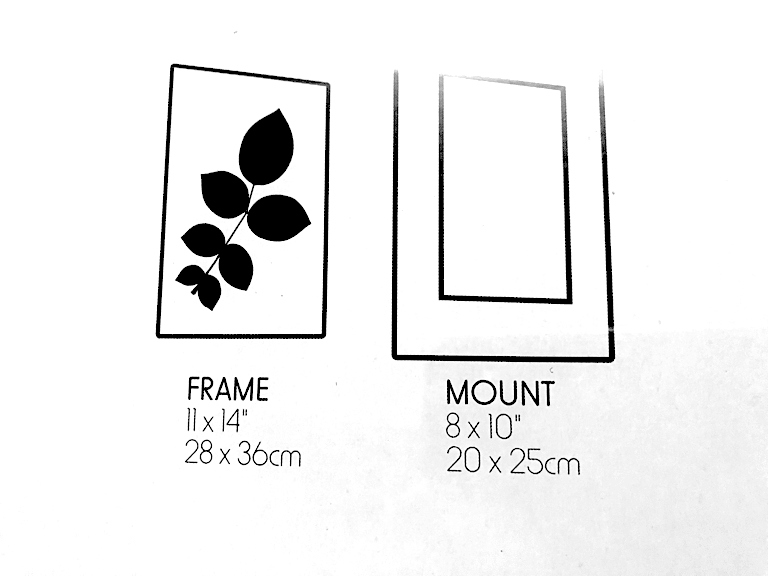
1: An 11 x 14″ (28 x 36cm) frame with an 8 x 10″ Mount.

The sizes can vary slightly so long as:

  • It has a strong backing that isn’t just cardboard
  • The back is clipped in place from the frame (and doesn’t slide in)
  • There is an included frame “mount” made of firm card
  • The felt you use is larger in size


2: A 16x 11″ (42 x 30cm) A3 Size thin Card Felt 

This is readily available from eBay and many online stores and the thin ones required cost well under $10. Search for “Magic Close Up Trick Mat“.  Be mindful that these are imported and may take a while to ship but I have found the quality of even the cheaper options to be more than fine for practise.

3: Flat Cardboard (greater than A3 Size)
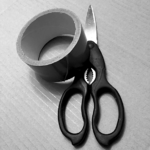
4: Strong Scissors
5: Large Roll of GAFFA (Cloth) Tape


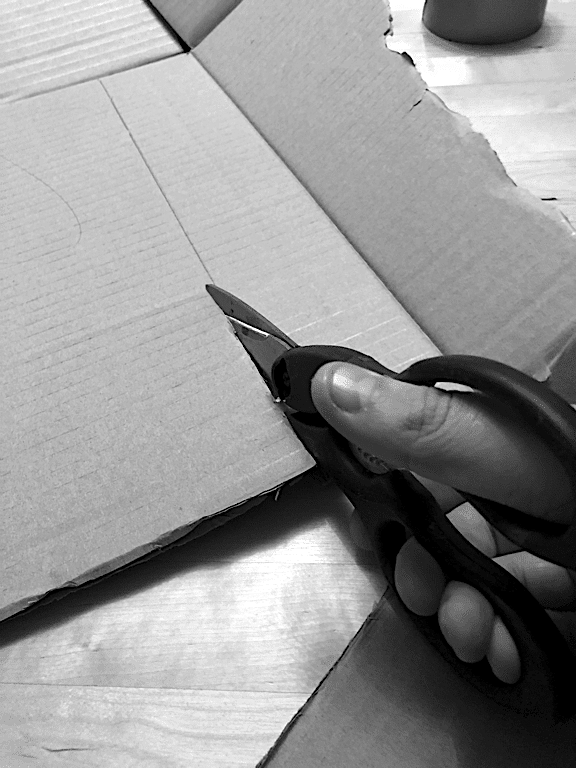
STEP 1: Cut the Cardboard

Draw around the frame on the flat piece of card board and cut it out to that size. This will initially be too large but will enable more precise trimming later.


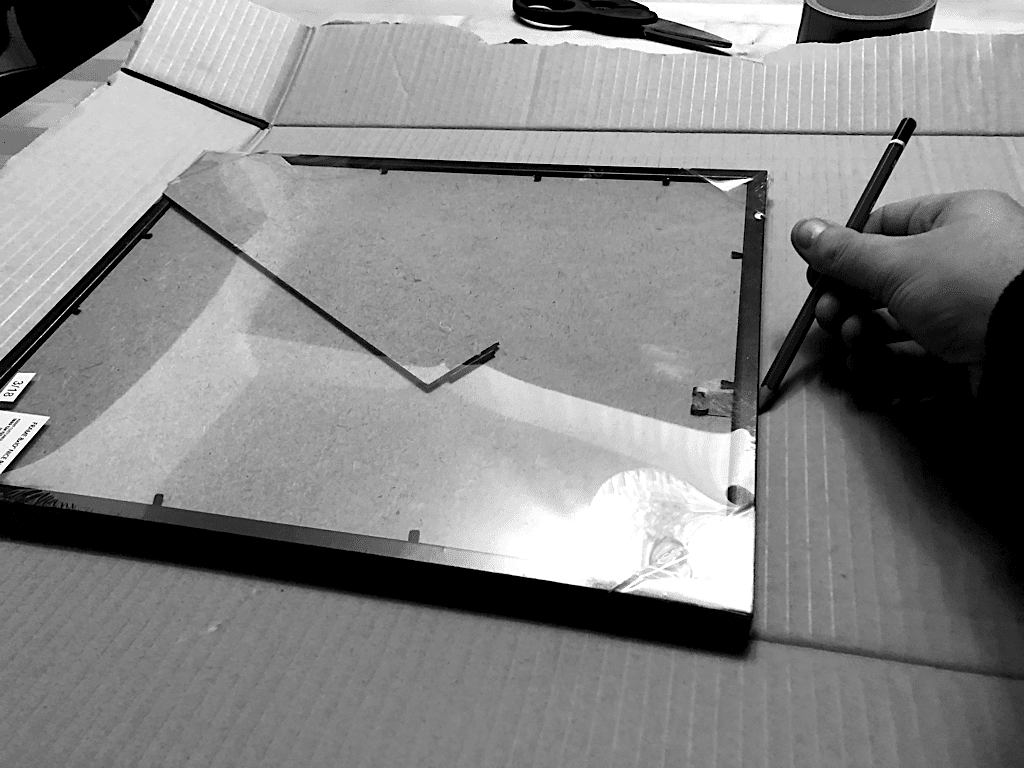
STEP 2: Prepare the Back

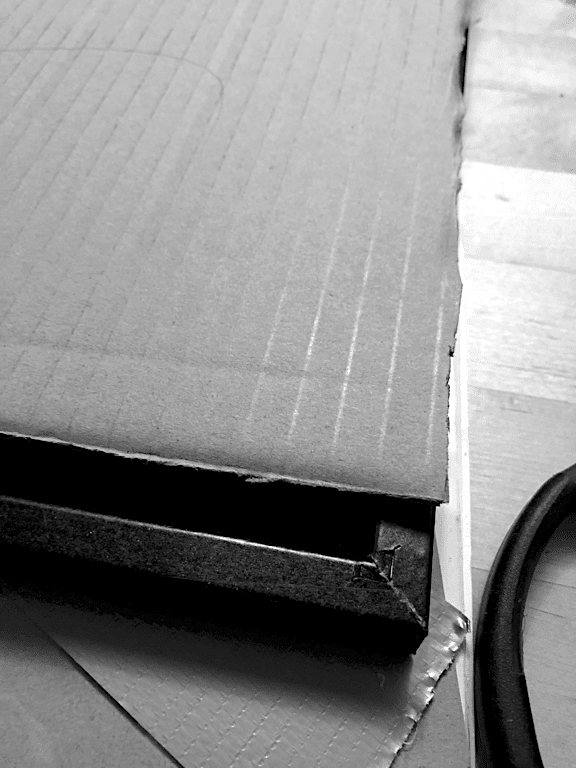
Remove any stands, clips or mounts directly attached to the rear board of the frame. This part needs to be flat so the surface is sturdy. Carefully remove the glass front and dispose of it. Tape it securely to ensure it won’t crack and become dangerous.


STEP 3: Trim the Cardboard

With the back board removed, lay the cardboard piece from step one over the back of the frame and trim to a size that fits inside.


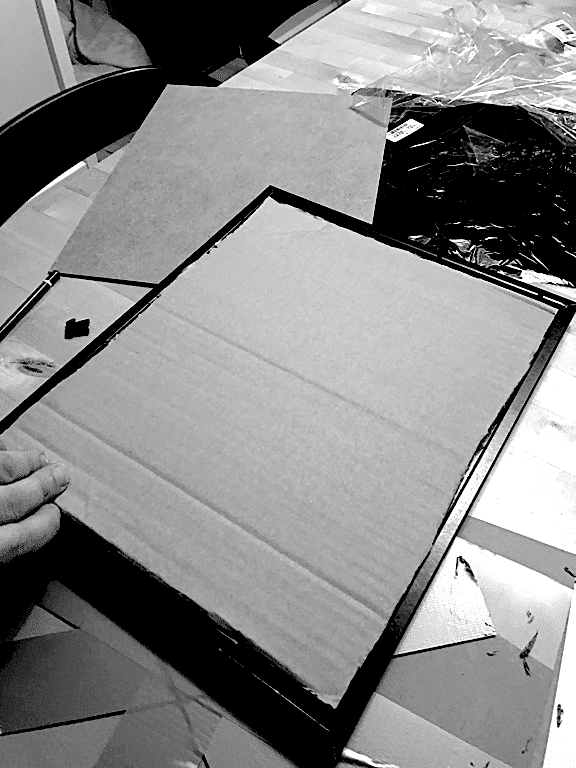
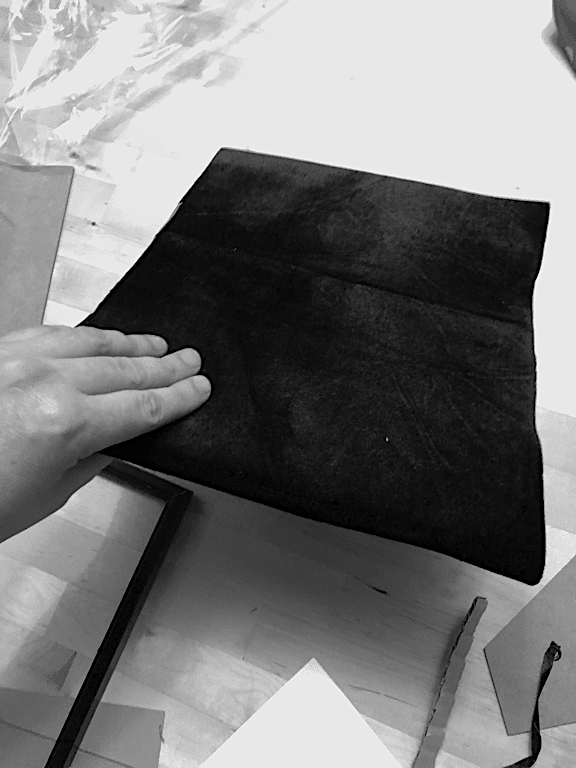
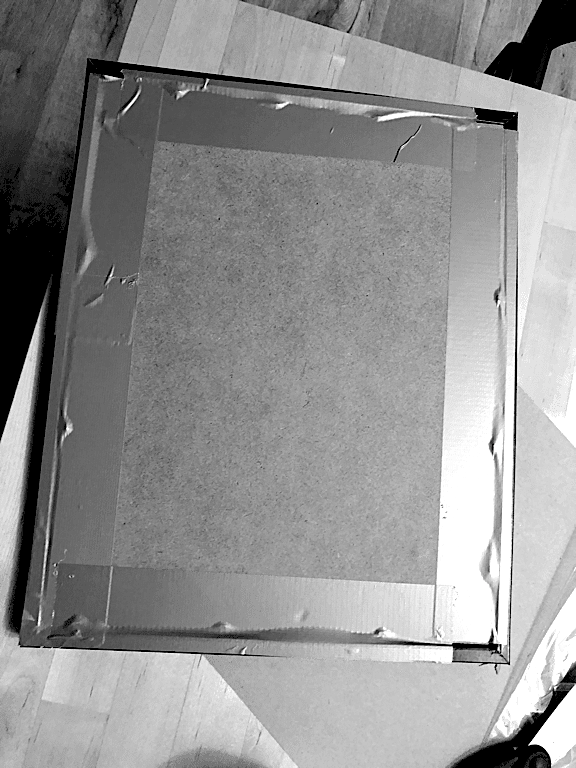
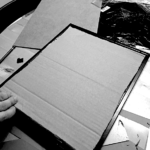
STEP 4: Attach the Felt

Lay the felt face down on the table and place the cardboard on top. Ensure it is evenly centred.

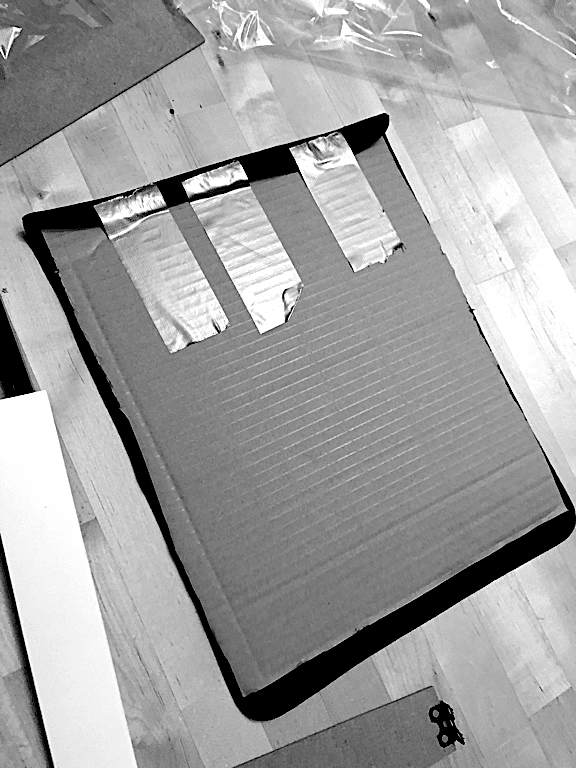
Pull the felt over from one of the short edges and tape in 3 locations (top middle and bottom). Do the same with the opposite short edge and ensure the felt is stretched flat.

Without placing tape in a visible place on the front of the felt, apply some long strips to the top and bottom long edges – securing them in place. These are not the main supports for the felt so don’t require too much.


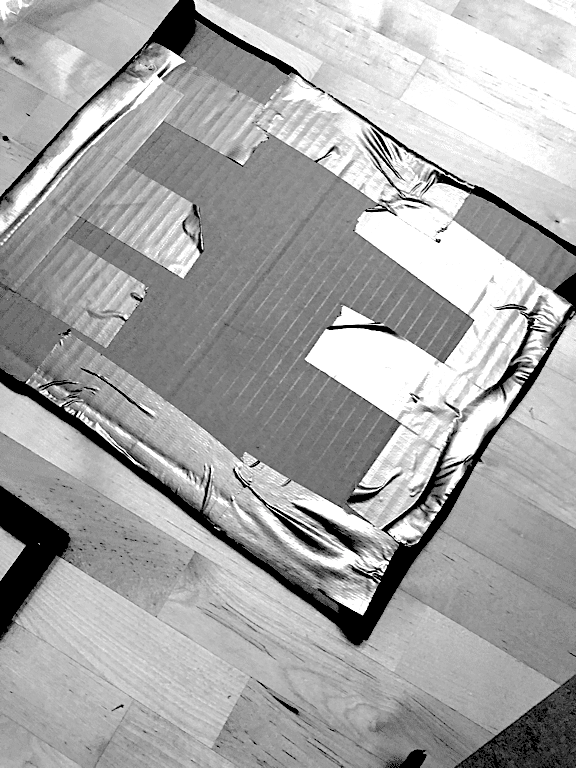
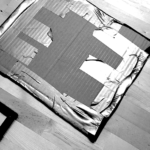
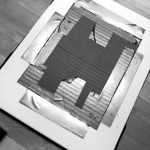
STEP 5: Add the Mount


Place the 8″ x 10″ Mount firmly over the top of the taped area and tape the centre edges to the cardboard – ensuring everything is as flat as possible.


STEP 6: Insert into the Frame

Push the Felt, Cardboard and Mount (now stuck together) into the frame. The glass should have been removed in Step 2 so the felt should push through the front.

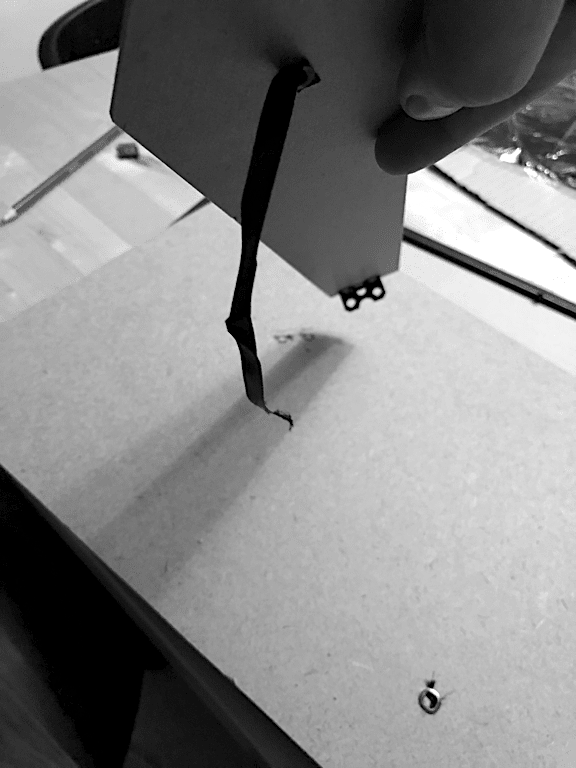
Ensure the clips that hold the back of the frame in place are all sticking out and aren’t bending under the structure as you insert it.


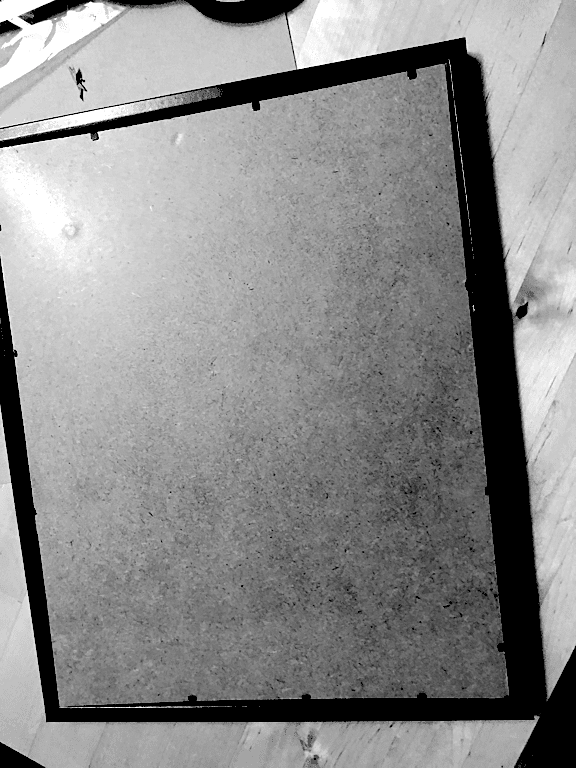
STEP 7: Clip on the Frame’s Back Board

Pushing everything down as far as possible, clip on the backboard in the same way the frame had originally. There is more mass to fit in so it will be more difficult to lock in than before.

Tape over the clips to ensure they don’t scratch when placed face down. This will also help to hold everything in place.


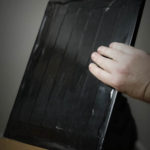
STEP 8: Tape up the Back


This step is optional, but seeing as I used a black frame with black felt, I opted to completely tape up the wood style back with Black GAFFA (cloth) tape. This makes it sturdier to hold and creates an over-all better look


STEP 9: Adjust as needed.


At this stage, or any stage during the setup process, don’t be afraid to pull off the tape and try again for better results. Using GAFFA (cloth) tape, instead of screws and nails, isn’t as permanent and allows for easy adjustments that won’t damage the structure.
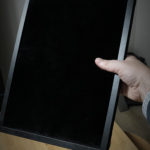

STEP 10: Practise!

Enjoy your new budget card surface anywhere and everywhere.