Ricky Jay

Unfortunately the world of magic lost one of its great cardmen recently.

I never had the opportunity to meet the man, and don’t have any unique or personal stories to share about the incredible Ricky Jay. But you cannot study gambling sleights and the various methods of cheating at cards without learning of his unmatched expertise and undeniable talents in the field.

He was an incredible magician and performer.  He starred in multiple TV shows and movies and was often seen slicing into watermelons by throwing cards at them with the finest precision.

I will continue to enjoy learning all that is available to me through his legacy of video productions and book publications.


As my humble tribute, I will share some of Ricky’s work below. The following clip is one of many examples of his mastery with a deck of cards.


Perfect Practice Makes Perfect

Perfect Practice Makes Perfect” is a quote from Richard Turner, one of the best card mechanics in the world. By altering the well known quote from just “Practice” to “Perfect Practice”, he is referring to working on moves and sleights but ensuring that work is focussing on correct techniques and methods. In short, practising how to do something imperfectly will not “make perfect”.

“The only shortcuts are at the butcher shop”

This quote comes from another master of his craft. Tommy Emmanuel, well known as one of the worlds best acoustic guitarists, insists that there is no other way to become great at what you do. Excellence requires constant hard work and dedication in your pursuits.


Not Bad, Not Ready

I have been practicing cards for well over 5 years now. I’ve explored magic, gambling, cheating and even created some of my own effects. I have accumulated a large amount of resources and knowledge about all areas of the subject and have met and consulted with some of the best magicians and card men in the world.

Am I good at this? Yes.
Am I good enough? Not yet.

The method behind magic tricks and gambling demonstrations often requires only minutes to learn. But to be able to perform the sleights effectively and consistently while maintaining the showmanship required for an entertaining performance takes months at minimum. Maybe years.

I once read an article where a magician compared this process to learning a musical instrument. This comparison resonated with me. If you have just started and learned to fumble through one or two basic songs on something new, would you go out and straight away perform to an audience? Even if you can navigate your way pretty confidently and only struggle at one or two parts, are you performance ready? No.

You shouldn’t just practise so you don’t make mistakes – practise so you CAN’T make them.

No retreat, No surrender

I have watched many performances where card masters who have been practicing their whole lives still drop that last Ace in a shuffle, or miss the crimp in a cut. I have personally been in situations where I have practiced cards solidly for months but when asked “Can you show me a trick?“, I just can’t.

This path is filled with multiple challenges. There is of course the physicality required to handle a deck of cards with confidence, but there are mental and social challenges as well. I still wouldn’t feel comfortable asking a stranger to “Pick a card” and I am assuming that no matter when I finally perform, I will never feel fully prepared.

Luckily for me practising cards is like meditation. My breathing and heart rate instantly slow down and my stress levels fade with every cut, spread, fan and shuffle. I thoroughly enjoy this process of learning and that helps me recover from those setbacks I encounter along the way.

The only true way to fail at something is to give up!

Match Practice

Unfortunately, there is only so far you can get having only a mirror or video camera as your audience. There is nothing wrong with practising alone, and I encourage doing this with every trick to ensure the moves become second nature. It is bad etiquette to perform routines that are underprepared as it risks revealing their secrets. It is always best to work on every part of every move, learn the script, become aware of all angles and make it a performance – not just a trick.

Ironically, the work behind magic and cards is designed NOT to be seen in front of spectators. It requires interactivity and a strong command of misdirection. This can only be achieved through working with an unpredictable and often critical audience.

At this stage, I have only dipped my toe into the magic performance world by publishing some of my work on YouTube. I am currently working on and refining a live set that will hopefully see me performing live by 2019.

Anywhere, Anytime

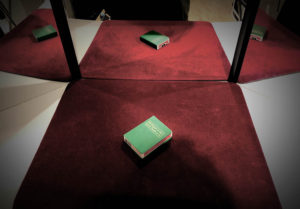
Unlike music, cards have the advantage of being easy to carry and versatile to practise. I always carry a deck with me and work on moves sitting, standing or even walking. I have portable card mats for table work in cafes, restaurants or aeroplanes.

Unlike music, card practice is not disruptive to those around you. If you have any hesitations, just see it as an alternative to poking a smart phone like everyone else is no doubt doing.


My Regular Routine

DAILY PRACTICE:

  • Bottom Dealing (with & without sailing)
  • Strike & Push Off Seconds (with & without sailing)
  • Blind Shuffles, False Cuts & Stock Controls
  • Spread Culling
  • New Routines

WEEKLY PRACTICE

  • Shifts, Passes & Colour Changes
  • Riffle & Overhand Shuffle Stacking
  • Deal Sailing (Speed & Accuracy)
  • Turnover & One Handed Seconds
  • Old Routines

OTHER PRACTICE

  • Card Switches & Mucking
  • Crimped, Stripped & Marked Cards
  • Greek & Centre Dealing
  • Flourishes
  • Creating Routines


Magic Card Surface for Under $20

My DIY Ideas

A habit I have when entering any creative area is “how would I do it?” Often before learning the method to a trick, I try to achieve the outcome by composing my own method.

The results of my experiments will be categorised on this website under “Creations“. The ideas will range from moves, tricks, decks and accessories.

Magic / Card Surfaces

I practice cards every day in all environments. It’s easy to have a deck in your pocket and practice your standing or in-the-hands sleights whenever there is a quiet moment.

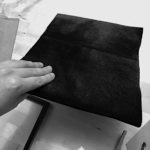
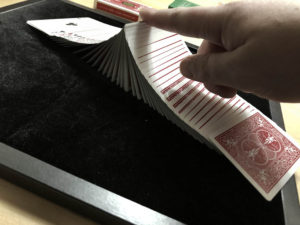
A lot of the moves I work on are based at the card table. This requires a felt mat to enable access underneath cards and packets when lifting them. Neoprene & Rubber roll up mats are most common and are available at many magic stores. These are great for your desk or table but I enjoy practising in other locations – like while travelling or even on the couch.

I experimented with stable table devices, portable fold-out card tables, stools and chairs – all of them were fine but very inconvenient to both store and set up. I eventually spent some money and bought some card surfaces from Dan & Dave’s website. These were both expensive to purchase and expensive to ship but, as with all of Dan & Dave’s products, the quality is outstanding. I now own the Aluminium Close Up Pad (perfect for travelling) and a Green Magic Surface.

Create Your Own Surface
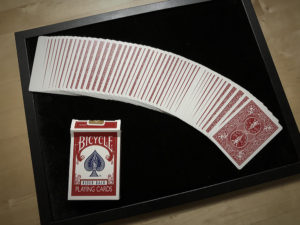
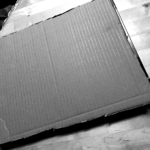
I have since created a way for those entering into card or magic work to create a surface that will suit their needs and their budget, until they can buy the real deal.

It may even eliminate the need for a more expensive option!


You will need the following 5 items:

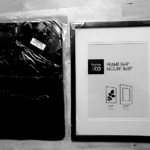
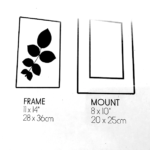
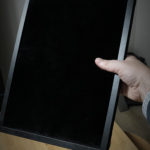
1: An 11 x 14″ (28 x 36cm) frame with an 8 x 10″ Mount.

The sizes can vary slightly so long as:

  • It has a strong backing that isn’t just cardboard
  • The back is clipped in place from the frame (and doesn’t slide in)
  • There is an included frame “mount” made of firm card
  • The felt you use is larger in size


2: A 16x 11″ (42 x 30cm) A3 Size thin Card Felt 

This is readily available from eBay and many online stores and the thin ones required cost well under $10. Search for “Magic Close Up Trick Mat“.  Be mindful that these are imported and may take a while to ship but I have found the quality of even the cheaper options to be more than fine for practise.

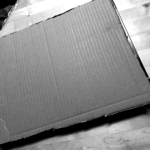
3: Flat Cardboard (greater than A3 Size)
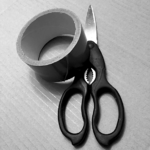
4: Strong Scissors
5: Large Roll of GAFFA (Cloth) Tape


STEP 1: Cut the Cardboard

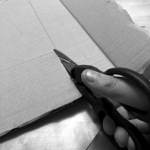
Draw around the frame on the flat piece of card board and cut it out to that size. This will initially be too large but will enable more precise trimming later.


STEP 2: Prepare the Back

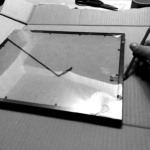
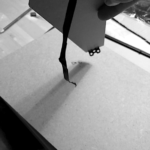
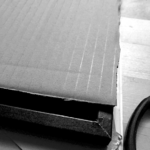
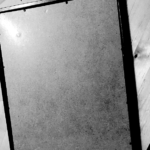
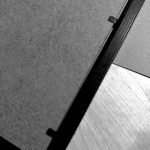
Remove any stands, clips or mounts directly attached to the rear board of the frame. This part needs to be flat so the surface is sturdy. Carefully remove the glass front and dispose of it. Tape it securely to ensure it won’t crack and become dangerous.


STEP 3: Trim the Cardboard

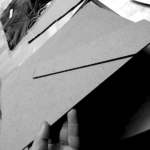
With the back board removed, lay the cardboard piece from step one over the back of the frame and trim to a size that fits inside.


STEP 4: Attach the Felt

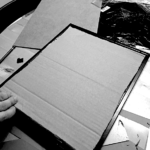
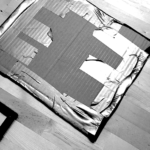
Lay the felt face down on the table and place the cardboard on top. Ensure it is evenly centred.

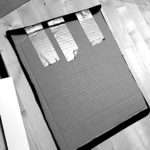
Pull the felt over from one of the short edges and tape in 3 locations (top middle and bottom). Do the same with the opposite short edge and ensure the felt is stretched flat.

Without placing tape in a visible place on the front of the felt, apply some long strips to the top and bottom long edges – securing them in place. These are not the main supports for the felt so don’t require too much.


STEP 5: Add the Mount


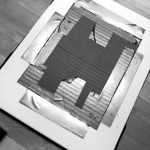
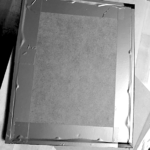
Place the 8″ x 10″ Mount firmly over the top of the taped area and tape the centre edges to the cardboard – ensuring everything is as flat as possible.


STEP 6: Insert into the Frame

Push the Felt, Cardboard and Mount (now stuck together) into the frame. The glass should have been removed in Step 2 so the felt should push through the front.

Ensure the clips that hold the back of the frame in place are all sticking out and aren’t bending under the structure as you insert it.


STEP 7: Clip on the Frame’s Back Board

Pushing everything down as far as possible, clip on the backboard in the same way the frame had originally. There is more mass to fit in so it will be more difficult to lock in than before.

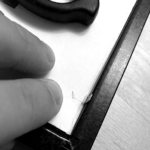
Tape over the clips to ensure they don’t scratch when placed face down. This will also help to hold everything in place.


STEP 8: Tape up the Back


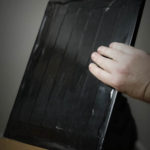
This step is optional, but seeing as I used a black frame with black felt, I opted to completely tape up the wood style back with Black GAFFA (cloth) tape. This makes it sturdier to hold and creates an over-all better look


STEP 9: Adjust as needed.


At this stage, or any stage during the setup process, don’t be afraid to pull off the tape and try again for better results. Using GAFFA (cloth) tape, instead of screws and nails, isn’t as permanent and allows for easy adjustments that won’t damage the structure.


STEP 10: Practise!

Enjoy your new budget card surface anywhere and everywhere.
Gold Seal Standards

So many options

It is hard for card fanatics like myself to limit yourself to one deck. I stay away from cheaper brands and those sold at souvenir shops. They are fine for fun but they lack the quality required for effective sleight of hand.

As I mentioned in my previous article “I am not a collector“, I only purchase cards that I will open and use.  If I do buy a deck with the intention of keeping it sealed, it is usually included in a bulk purchase.

Often I’ll buy a brick where I’ll open some and sell the rest. Due to the limited supply in Australia, I can end up recouping a lot of the initial cost. These days, for me to consider purchasing any single decks to store, the investment would have to be significant.

One of my Favourite Decks

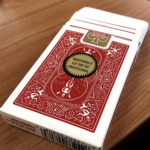
One of my favourite decks of cards (for both performance and practice) are the “Bicycle Gold Standards”. They are also known as “Gold Seal”. They come in RED and BLUE and I cannot recommend these highly enough.

These were designed in collaboration with the renowned card cheat  Richard Turner and are printed at USPCC.


As Advertised:

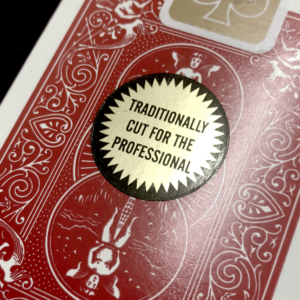
Each deck of Gold Seal Bicycle Cards is constructed using Bee stock, world renowned for its flexibility, yet long-lasting durability. They are stamped to a caliper/thickness that facilitates classic moves like bottom and center dealing and are embossed to a depth that does not break down the structural integrity of the card, yet still allows each card to breathe properly, thereby reducing the gum-up and hangers often caused by finger moisture. But, most importantly, since these cards were manufactured to Richard Turner’s demanding personal specifications, they are Traditionally Cut!
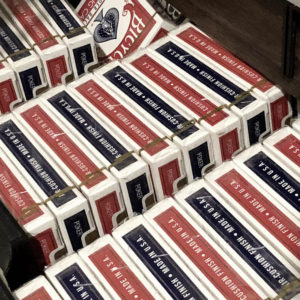
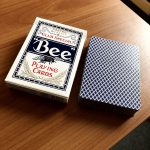
For me, these cards bring all of the advantages of my preferred casino style decks to the standard “magic” design of Bicycles. Much of my work is focused on gambling demonstrations and cheating, so I find casino card stock is much better for shuffle and dealing.

They also seem to last a lot longer than standard USPCC decks. I would destroy standard Bicycles in a day or 2 but could use one of these decks for up to a week. When you consider their resilience vs their cost they end up being quite good value.

Buy In Bulk

As always, down here in Australia, there isn’t a steady supply available in stores. If you want to try these awesome decks, you’ll most likely have to get them imported.

eBay is reasonably affordable for 1 or 2 decks but I recommend saving up to buy in bulk and avoid those excessive shipping costs!


Backs Without Borders

Most of the card work I enjoy uses false dealing, blind shuffles and cheating sleights. This is much more easily achieved when using a “borderless” deck. Most if not all of the moves can still be done with a bordered deck, but the angles and shade are much more limited.

While practising the gambling moves, there was a time where I thought the use of a borderless deck was “cheating”. So … I was cheating at cheating! The  expectation I put on myself was to be able to work with any deck of cards. Everything should be as hard as possible and the more margins the merrier!

Yes, it is good to be versatile and I encourage everyone who is interested in studying work such as false dealing or blind shuffles to get their hands on as many different deck types as they can.  However, I have since come to the realisation that if I get to choose the deck, and I am in control of the environment (as I would be for a performance), there is no shame in using a deck that more effectively hides the dirty work behind its edges.

The classic borderless deck, and one of my favourites, is the trustworthy USPCC Bee deck. A standard among many casinos, the traditionally cut cards with their cambric finish always perform. They are often seen used by card masters such as Richard Turner and Ricky Jay for their own gambling demonstrations.

These cards are not readily available to purchase in Australia so I mostly have to import what I use. I especially enjoy the decks made in the OHIO factory 10 or more years ago (yes the same cards can feel different). So I keep my eye out for “New Old Stock”, often outcast from casinos.

There are also some more modern borderless decks that I enjoy working with:

Of course bordered decks do have their advantages. Double lifts and Triumph routines come to mind. So if you need to, or you simply enjoy working with bordered decks, there is a hybrid borderless-bordered option. All decks with a minimalist white back work really well in both scenarios. Daniel Madison has produced some excellent examples of this:

I have also seen some experimentation with partially bordered decks, where only some of the sides are bordered. I am sure these cards have some advantages in both ways but my experience using them is limited.